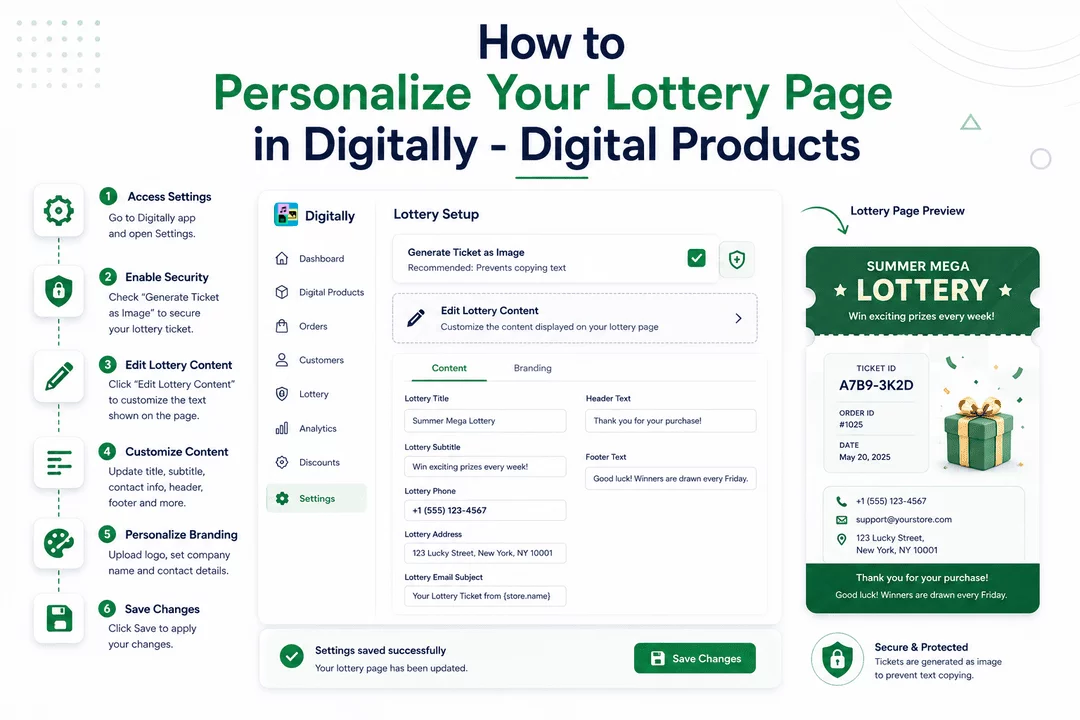
Enhance your customers' experience by customizing the lottery page they see after purchasing your digital products. Follow these simple steps to align the content with your brand's identity.
Step 1. 🛠️ Access the Settings
- In your Shopify admin, navigate to the Digitally – Digital Products app.
- Click on the Settings tab to begin customization.

Step 2:
At the top of the Lottery Setup, you'll see a checkbox labeled “Generate Ticket as Image.”
Enabling this option is recommended—it converts the lottery ticket into an image, preventing users from copying any text and helping to keep your ticket content secure.

Step 3. ✏️ Edit Lottery Content
- Within the settings, locate and click on Edit Lottery Content.
- This section allows you to modify the text displayed on the lottery page.

Step 4. 📝 Customize the Content
- In the Content tab, you'll find various fields to update:
- Lottery Title: Set a title for the lottery.
- Lottery Subtitle: Provide a subtitle for additional information.
- Lottery Phone: Enter a contact phone number.
- Lottery Address: Provide a physical address.
- Lottery Email Subject: Set the subject line for lottery-related emails.
- Header Text: Customize the header text.
- Footer Text: Customize the footer text.

Step 5. 🎨 Personalize Branding
- Switch to the Branding tab to adjust your company's branding elements:
- Upload Company Logo: Add your logo to reinforce brand identity.
- Company Name: Ensure your company name is correctly displayed.
- Contact Details: Provide contact information for customer support.


Step 6. 💾 Save Your Changes
- After making your desired changes, click the Save button to apply them.
- Your updates will be reflected on the lottery page, providing a seamless and branded experience for your customers.

Pro Tip: Regularly review and update your lottery page to keep it aligned with any branding changes or new product offerings.