How to Add Your Mailchimp Audience ID in the Digitally – Digital Products App
Connect your Mailchimp Audience ID to the Digitally – Digital Products app by copying the ID from Mailchimp and pasting it into the integration settings. This enables automatic syncing of eligible customer data to your selected Mailchimp audience.
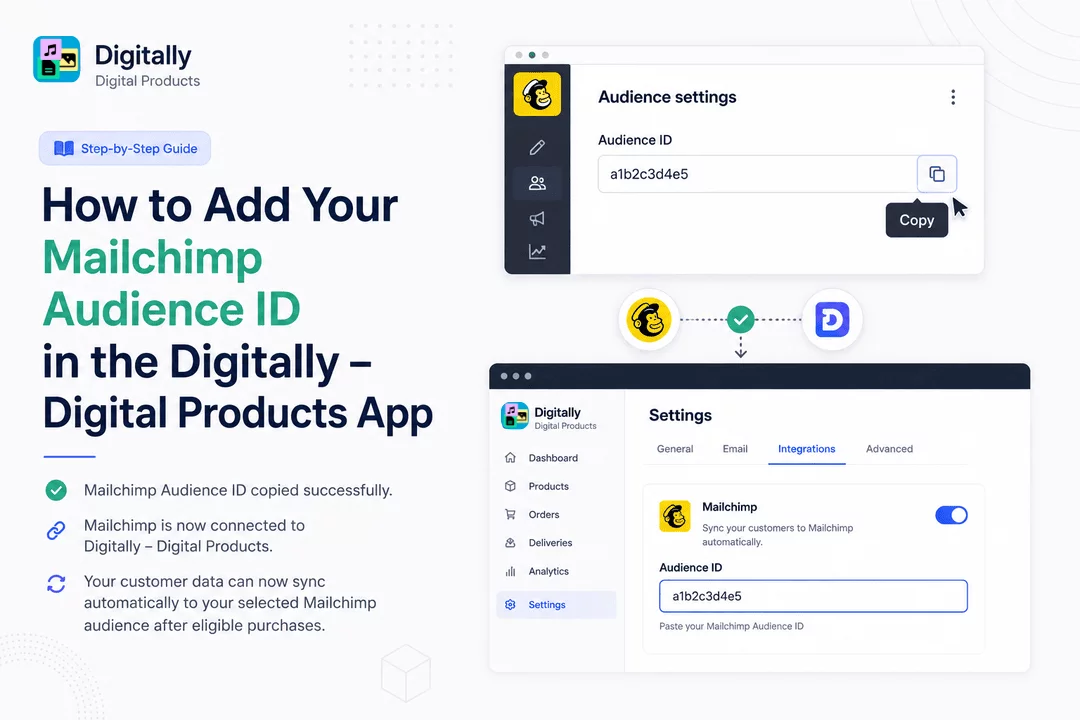
Follow these simple steps to connect your Mailchimp Audience ID with the Digitally – Digital Products app.
🔐 Step 1: Log in to Mailchimp
Sign in to your Mailchimp account.

👥 Step 2: Open the Audience Section
From the left-hand menu, click Audience.

⋮ Step 3: Open More Options
Click the three-dot (More Options) button in the Audience section.

⚙️ Step 4: Open Audience Settings
Select Audience Settings from the dropdown menu.

📋 Step 5: Copy the Audience ID
Locate the Audience ID and click the Copy icon.

📱 Step 6: Open the Digitally App
Go to your Shopify Admin and open the Digitally – Digital Products app.

🔗 Step 7: Open Integrations
Navigate to Settings → Integrations.

🔗 Step 8: Enable the Mailchimp Integration
Find the Mailchimp integration card. If it's disabled, enable it first.

📋 Step 9: Paste the Audience ID
Paste the copied Audience ID into the Audience ID field.

💾 Step 10: Save Automatically
Click anywhere outside the field. Your Audience ID will be saved automatically.

✅ Mailchimp Audience ID copied successfully.
🔗 Mailchimp is now connected to the Digitally – Digital Products app.
🔄 Your customer data can now sync automatically to your selected Mailchimp audience after eligible purchases.