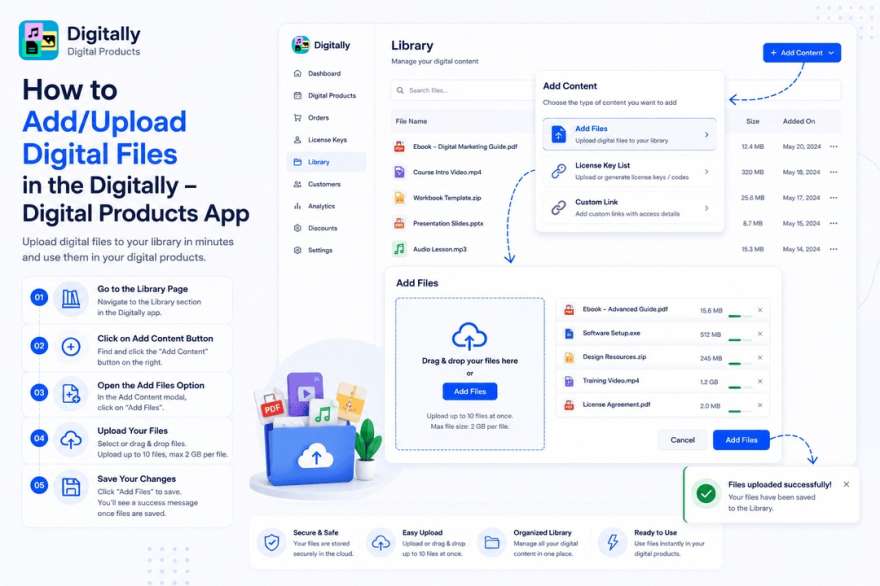
Uploading digital files to your library in Digitally – Digital Products is simple and fast. Here's how you can easily add your files for future digital product creation.
✅ Step 1: Go to the Library Page
Start by opening the Digitally – Digital Products app from your Shopify dashboard.
Navigate to the Library page, where you can manage your digital content.

✅ Step 2: Click on the Add Content Button
On the Library page, locate the Add Content button on the right-hand side of the screen.
Click on this button to start the process of adding files to your library.

✅ Step 3: Open the Add Files Option
Once the Add Content modal opens, click on Add Files to proceed with uploading your digital files.

✅ Step 4: Upload Your Files
Click the Add Files button to select files from your computer, or simply drag and drop your files into the designated area.
- Upload Limit: You can upload up to 10 files at once, with each file being a maximum of 2 GB.

✅ Step 5: Save Your Changes
Once you’ve uploaded your files, don’t forget to save them.
Click on the Save button (usually labeled Add Files) to save your changes.

A toast notification will appear, confirming that your files have been saved successfully.

🎉 All Done!
You’ve successfully added your digital files to the Library. You can now use these files when creating digital products for your customers.